
Setting up an Opera adjustable bed is relatively easy, especially if you have assembled bedroom furniture before. The assembly process usually takes less than an hour or so, but this will depend on the bed design and size.
In this article, we’ll explain how to set up an adjustable bed from Opera so you can familiarise yourself with the process. We’ll also provide tips and advice on how to care for your new adjustable bed, so your comfort lasts a lifetime.
If you’d prefer to have your bed set up for you, we provide our own home installation service. Our Opera engineers will install your adjustable bed in any room of choice and give a full handover demonstration on how to use it.
Before Assembly
It is essential that you have already measured where your Opera adjustable bed is going to be installed. Adjustable beds are often bigger than a standard bed, so be sure you have checked it will fit your bedroom before purchasing. If you are unsure or need some help, get in touch with our team who are happy to assist.
Note: For an Opera adjustable bed, we recommend that two people install them. This is due to the weight of the individual parts.
Tools and Materials You’ll Need
Before you get started and set up your Opera adjustable bed, check you have the following:
- Wall space with a plug socket nearby
- Pair of scissors
- User manual (for specific instructions)
- Adjustable bed base and surround (if applicable)
- Remote control (dual beds come with x2 controls)
- Mattress
How to Install Your Opera Adjustable Bed Base
When purchasing any Opera adjustable bed, you will receive our instruction manuals with easy-to-follow steps.
If you prefer, watch our adjustable bed installation video.
Step 1 - Remove the outer packaging
Slide the adjustable base out of the cardboard box and remove the protective outer wrapping.
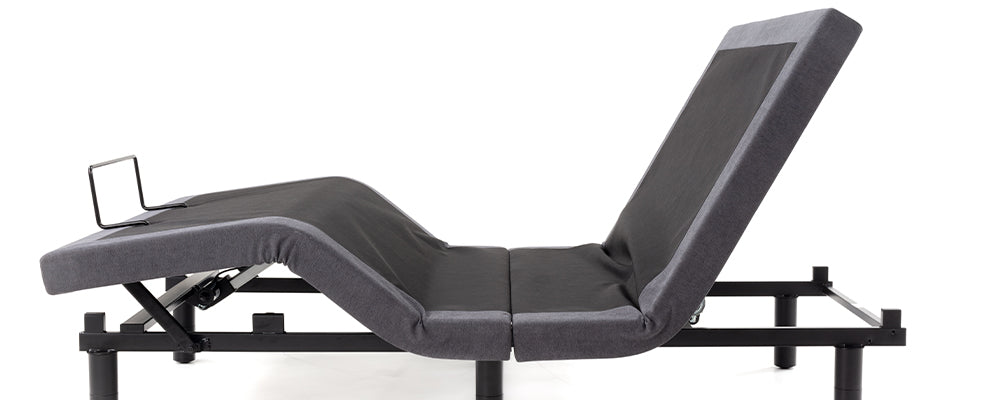
Step 2 - Unfold the adjustable bed base
Lay the bed base flat on the floor and unfold it.
Step 3 - Detach boxes
Use scissors to carefully cut through the yellow cable ties to remove the boxes attached to the base.
Step 4 - Open the boxes and check the contents
Carefully open the boxes and remove the contents. Check all the components are present. You should have the following contents:
- 6 x OP051 Screw-In Feet
- 1 x OP052 Handset
- 1 x OP053 Power Transformer
- 1 x OP054 Mains Power Cable
- 1 x OP055 2 x Mattress Bar
- 2 x OP056 Deck Securing Pins/Clips
- 2 x OP057 9V Batteries
- 2 x OP058 AAA Batteries
Note: If you believe to be missing any components, get in touch with our product support team who can help.
Step 5 - Insert deck-securing pins
Secure the two halves of the folding deck by inserting the deck-securing pins through the adjoining holes. Secure the pins with the clips.
Note: this step is not required for any Opera adjustable bed with the plus base technology.
Step 6 - Attach the feet
Screw feet into the threaded screw holes.
Note: If you are installing the Motion Divan Adjustable Bed, the extension legs should also be fitted at this stage. These are in a separate box.
Step 7 - Add the batteries to the transformer
Insert the two 9v batteries into the power transformer. This will ensure you have a power backup for the bed in the event of a power cut.
Step 8 - Connect the power transformer
Locate the base power inlet lead (marked with ‘POWER’ at the inlet of the control box). Connect this lead to the power transformer by coupling the plug/socket and secure it by clipping the cover latch. Then insert the mains power cable into the power transformer.
Step 9 - Turn the base onto its feet
Turn the base over onto its feet.
CAUTION: The base is heavy; we advise having two people turn it over.
Step 10 - Add the mattress retention bars to the base
Insert the mattress retention bars into the holes at the foot end of the base.
Step 11 - Add batteries to the handset
Insert the two AAA batteries into the handset. To check the handset is powered on, press any button and you should see the backlighting illuminate.
Step 12 - Connect the bed to the mains power
Plug the base into a mains power outlet and switch on.
Step 13 - Pair the handset
When the bed is switched on at the power outlet, you should see a light on the control box underneath the bed flash blue. This indicates that the bed is in pairing mode.
Hold the PAIR button on the handset for 5-10 seconds until the control box light underneath the base changes to green.
If your base does not pair the first time or becomes disconnected, locate the PAIR button on the control box and press it. The control box light will illuminate blue to indicate the base is ready to pair.
Step 14 - Test the features of your bed
Use the handset control to test all the features of the bed:
- Raise and lower backrest
- Raise and lower leg rest
- Activate anti-snore mode (this will raise the backrest to a gentle incline)
- Activate zero-gravity mode (this will partially raise the back and leg rests
- to simulate weightlessness)
- Select the centre ‘flat’ button (this returns your motion base to a flat position)
- Select the underbed light button and confirm illumination. (this feature is available on plus bases only)
- Place a mattress and lie on the base before testing massage functions. (This feature is available on plus bases only)
Installation complete
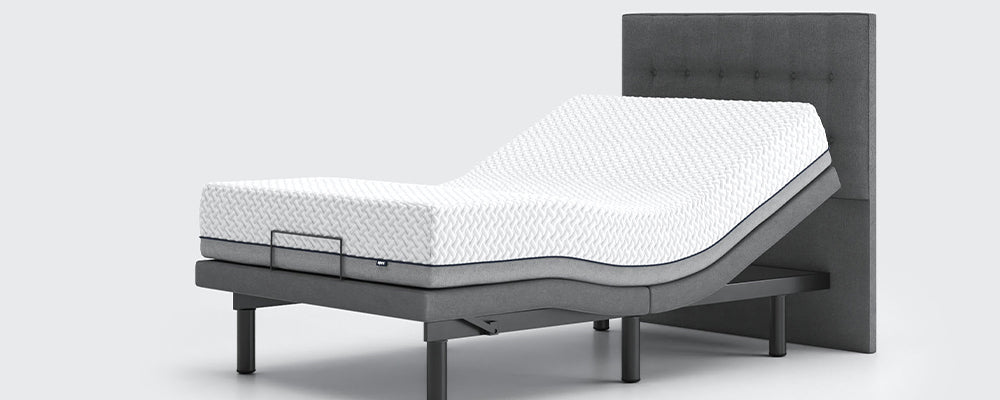
How to Install Your Opera Adjustable Base with a Headboard
If you have purchased the Motion Adjustable Bed, see the below steps to attach the headboard.
Before Assembly
Before starting to assemble, check you have all the contents needed to install your bed. You should have the following:
- 2x Headboard bracket
- 1x headboard
- 4x bolts
- 8x washers
- 4x thumb screws
- 4x nut
Tools and Materials You’ll Need
- An Allen key
- Spanner
- Screwdriver (for screw corner feet)
Step 1 - Attach the brackets to the bed frame
Elevate the bed backrest to the highest setting to allow enough room to work with the metal bed frame. Locate the two holes on the head end of the frame to attach the bracket. Using the bolts and washers place the bolt through the bracket.
Ensure the bracket is in the correct position by lowering the backrest to the flat position and aligning the bracket approximately 5mm away from the backrest edge. Tighten the bolts into the bed frame using the Allen key. Repeat for the opposite side.
Step 2 - Tighten the headboard thumb screw
Place the thumb screws into the headboard and the bracket holes. Place the washers and nuts onto the thumb screw inside the bed frame. Tighten the nut using a spanner. Ensure the nut has been tightened enough to prevent any unwanted movement with the headboard.
Step 3 - Test the headboard
Make sure to check the headboard is secured to the bed ensuring there is minimal movement.
Installation complete
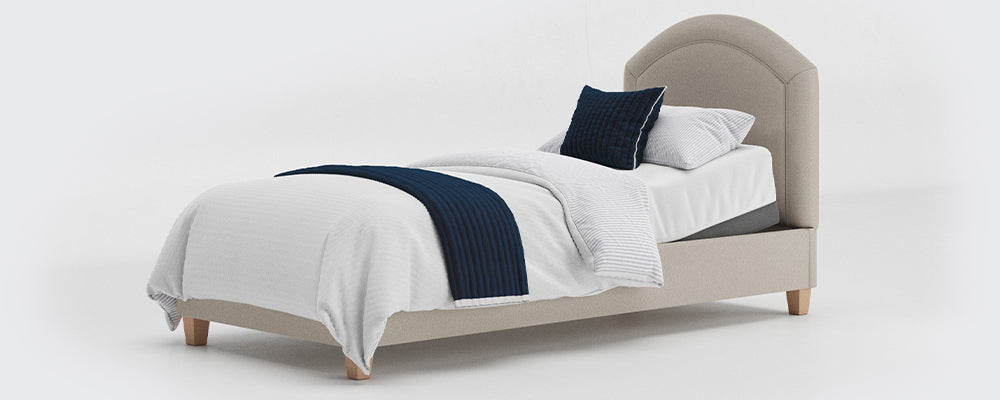
How to Install Your Opera Adjustable Base with Surround
If you have purchased an Opera Premium adjustable bed, follow the steps below to assemble the surround.
Step 1 - Remove the outer packaging
Unwrap the headboard, footboard, side skirts and feet. Check you have all the content needed for the assembly:
- 1 x Headboard
- 1 x Footboard
- 2 x Side Skirts
- 4 x Feet
- 1 x Allen Key
Step 2 - Prepare the headboard
Lay the headboard on its side of back near where the bed will be positioned in the room. Loosen the four threaded bolts (two at either side of the base of the headboard) but do not remove them entirely.
Use the Allen key or loosen it with your fingers.
Step 3 - Connect the side skirts
To connect the side skirts to the headboard, hook the brackets around the securing bolts. Secure the skirts by tightening the securing bolts using the Allen key. Repeat for both sides of the bed.
Step 4 - Add the footboard
Attach the footboard to the end of the skirts by loosening the securing bolts and hooking the brackets over them, this is the same as the headboard. Tighten the securing bolts using the Allen key.
Note: Before attaching the bed feet, you may find it easier to tilt the bed surround onto its side.
Step 5 - Attach the feet
Attach the four feet to the underside of the four corners of the bedstead.
There are two types of feet with differing fixing methods:
Threaded feet: These feet come with threaded metal bars on the top. Simply insert the threaded bar into the threaded holes in the four corners of the bedstead and screw in until tight. Repeat for each of the four corners.
Screw corner feet: Position the corner feet into the corners of the bedstead inset by 10mm from the edge of the surround. Using 60-80mm countersunk screws and a screwdriver, fasten the feet to the bedstead surround. Each foot has
2-4 pre-drilled screw holes.
Bed stead surround complete
Note: to complete the installation, place the motion bases into the surround. It is easiest if you first raise the back and leg rest up beforehand. Once in place restore power to the bed.
Enhancing Your Sleep Experience
Adjustable beds are a great investment to improve your quality of sleep and can even have a positive impact on your health and well-being. To make your adjustable bed even comfier and more supportive, you can follow these tips and techniques to enhance your overall sleeping experience:
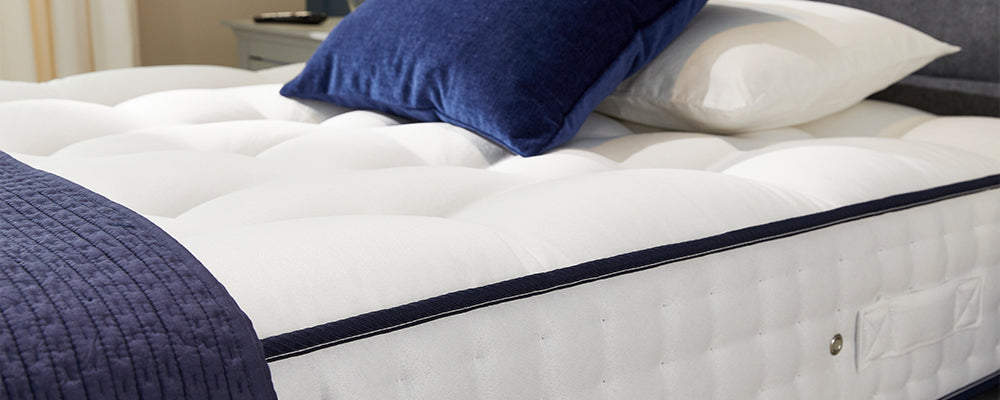
Choose the right mattress for you
The mattress you select plays a crucial role in comfort and support. Consider a mattress that is compatible with an adjustable bed, all Opera mattresses can be used on our adjustable beds.
If you’re unsure which mattress is right for you, speak with our team of experts for advice and recommendations.
Pillow selection matters
Opting for pillows that are suitable to your sleeping style and adjustable bed will help to provide even more comfort. Our premium cool gel pillow is a great option if you or your loved one requires extra support for the neck and shoulders.
Bedding
Ensure your bedding, including sheets and blankets, is appropriate for the movement of an adjustable bed. Adjustable bed sheets and split sheets can accommodate the shape and movement of these beds.
Browse our wide range of bedding, which includes complete bundles for a great night’s sleep.
Caring for your Adjustable Bed
Adjustable beds are an investment so it’s important that you look after them to prolong their lifespan. All Opera adjustable are electrically adjustable, so caring for them will ensure they continue to function properly.
Here are some essential care and maintenance tips:
- Protect Against Moisture: Avoid exposing your adjustable bed to excessive moisture, which can lead to rust and damage. Keep it away from sources of water, and use a waterproof mattress protector if needed.
- Check Power Cords and Connections: Examine the power cords, plugs, and electrical connections regularly. Ensure that they are in good condition and securely connected.
- Follow the weight restriction of the bed: overloading the bed or exceeding the weight capacity can lead to damage to the bed.
Every Opera adjustable bed purchase includes a 3-year warranty. Warranty upgrades are available for added peace of mind your comfort is covered.